So, it’s time to start talking about sewing. I’ve been doing more and more of this lately because I can only weave so many dishtowels and scarves and I really love having the ability to make clothes that fit and flatter. Even better that they’re made from cloth I’ve woven myself. As my friends have watched my progress, some have also gotten the sewing bug and I wanted to pass on some of the help that a good friend has given me. A “sew-along” seemed like a good way to do this both for accessibility (not everyone is on Ravelry) and also to ensure the information would be around for anyone not wanting to start at the same time. And here we are. On with the show!
The first thing I want to talk about is tools – or what’s often thought of as “notions”. Sewing machines are a whole different beast, and I’m not going to cover that at all (either you already have one or you can simply hand sew your pieces) but there are some small things to get that will make your life easier when it comes to cutting, assembling, and sewing your project.

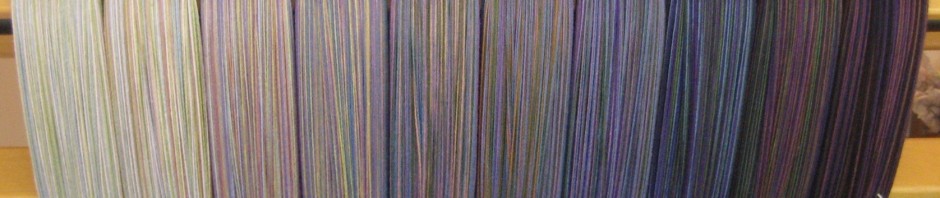
Some handy tools
Pictured above are (clockwise, starting from upper right) a clapper, 8″ angled dress shears, seam ripper, point turner, tailor’s chalk (two kinds), pins, sleeve pressing roll, and a tailor’s ham. Underneath is a see-through ruler that has both a grid and standard measurements. You can find most of these things at your local fabric store, like a JoAnn’s, or you can get them from mail-order places like Sew True Supply (no affiliation, just a super happy customer). The shears, pins and seam-ripper are mandatory – all the others are “nice to have” but you’ll quickly find that the ability to properly press your garment makes a HUGE difference when seaming or finishing. They’re not expensive and they’ll also help improve your everyday pressing. Two things that didn’t make the picture are pattern weights and a sewing gauge – again, both readily available at JoAnn’s or other fabric store.
Dress shears longer than 8″ can be difficult to get around corners – for long straight cuts, you may want to go with a rotary cutter/mat set (often used for quilting). But, regardless of size, make sure the shears you buy have an angled handle so that the blades run parallel with your cutting surface. As for pins vs. pattern weights – I prefer the latter. I find that it’s easier to cut out pieces and I get less distortion. Whatever works best for you is what you should use. But, if you are going the weight route, you’ll want at least eight of them if you’re cutting out garment-sized pieces.
Finally, the other thing you need is a good iron. It should have multiple temperature settings so that it can deal with multiple fabric types and also the ability to both work as a dry or steam iron. And, that steam should not only be hot, but there should be a lot of it. Heavy irons mean less effort for you when pressing, so don’t think “lightweight.” I finally got my dream iron – a Consew from AllBrands. This thing makes me look like a hero. I took some flack when I got it (you bought a WHAT?!?) but, the first time my husband needed to iron a dress shirt, he was a convert. The downside of this iron is that I needed to put hooks in the ceiling to hang the reservoir, but there are ironing boards that include a mounting point for the tank. Regardless, sewing is as much about pressing as it is about making stitches – so don’t skimp.
Ok, first post done. The next one will cover looking at and navigating a pattern.
I agree very much with the importance of pressing for good sewing! It’s equivalent to good yarn management skills when spinning.
I grew up in a household where everyone learned to sew because we couldn’t always afford the clothes we wanted, and the iron was a huge part of that. We didn’t have a really good iron, but I learned some tricks that help when a good iron is not in the offing (for whatever reason). I have to admit that I’ve never had access to a Really Good Iron, so I don’t know how these tricks compare to that, but they’re useful to me.
The first thing is that when there’s a stubborn crease in the fabric and it’s okay to get it wet because the iron will dry it out, a squirt bottle that makes a light spray is my friend. A light spritz of water along a stubborn crease in cotton or linen followed by a press with a dry iron will make things better. If a spray bottle isn’t available, dipping a finger in water and tapping along the line of the crease will do, too.
The second is how I was taught to press wool fabric when I don’t have good steam. I get a linen dishtowel and get it damp, but not dripping wet. I place that on top of the wool fabric, and then press the dishtowel. The heat of the iron turns the water in the dishtowel into steam.
Ironing day for linen and cotton garments in our house in my childhood involved sprinkling all the clothes with water shaken out of a loose fist until the clothes were splotchily damp, then putting everything in a bag together for a few hours. The dampness would have spread out evenly through the clothes, and then we’d press them in a marathon session, one of us reading to the other.
Thanks for the comment, Naomi.
I remember my mom using a spray bottle to deal with stubborn creases and I think my household iron has a “spray” button that I’ve used in times past. Great solutions for irons that don’t have quite the oomph you might like.
And I sure could use someone to entertain me when I have, literally, dozens of dishtowels to press. Thank goodness for radio and audiobooks.