A while ago, I was talking with some friends about sizing singles yarn and whether or not sizing made it easier to use as warp (or weft). Lots of back and forth about what sizing to use, how to do it and whether or not it’s worthwhile. Based on that conversation, I agreed to do a post on how I go about sizing my handspun and, finally, here it is.
First off, a bit on whether or not it’s worth sizing yarn. Based on a truly horrible experience with a singles wool warp last summer, I’m going to say “yes”. Another reason to do it – the “active time” involved with sizing yarn isn’t very much at all. The process I detail below took me all of an hour this morning. Winding the yarn into skeins and steaming was probably another hour for each pound of yarn, so we’re talking two hours total. On the other hand, dealing with that incredibly sticky and recalcitrant warp added at least eight hours of cursing, spraying with spray-starch, using a pickup stick to clear sheds to the weaving and generally drove my blood pressure into the stratosphere. So, a few hours to size a few pounds of yarn? Very well worth it.
Next up, what does sizing do? Sizing puts a coating on yarn that does three important things – first, it stiffens the yarn which reduces ply-back and tangling. Second, the coating tames the fibrils on the surface of the yarn which reduces the stickiness of sheds and, finally, it helps protect against the abrasion of the reed moving back and forth along the yarn when beating the weft into place. Now, the thing sizing won’t do, is salvage a poorly-spun yarn. Yarn that’s under-spun will drift apart under tension (or even while winding your warp) so it’s not a universal fix for everything. If you have thin spots, it might delay the break, but that’s just hiding a weak spot in your fabric because you’ll be washing the sizing out after you’ve woven the cloth. Bottom line is that it’ll make life easier when you’re weaving but it won’t make your yarn (or, by extension, your cloth) better.
Ok – on to the process. There are lots of things that you can use to size yarn – milk, flour, glue, potato starch – pretty much anything that you can apply to your yarn, dries somewhat hard and is able to be washed out post-weaving. I use gelatin for sizing; specifically, the instant gelatin that you can get at the grocery store because it’s easy and readily available.
Step 1 – Skein and tie your yarn
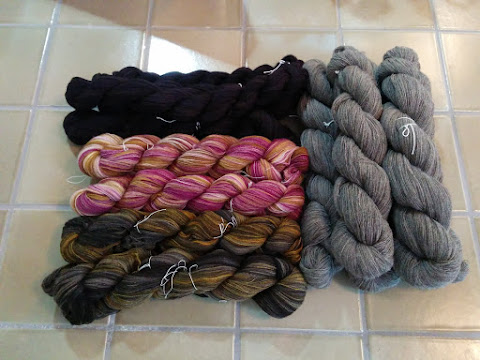
This is about 2 1/2 pounds of wool yarn. Each skein has at least two ties to help keep them organized. The ties should be loose, just like you would for dyeing, so that the size can easily penetrate underneath. When I’m winding off my yarn, I take the added step of steaming them while still on the noddy so that they’re easy to store. It’s not strictly required, but it’s what I like to do. I also try (and often fail, or I lose the index card) to write down the yardage of each skein so that I’ll have an idea of my yardage after all is said and done.
Step 2 – Soak your yarn
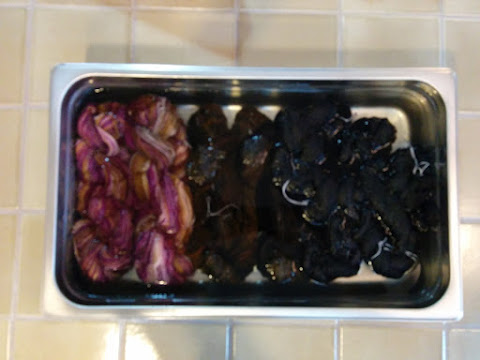
Yeah, blurry. Bottom line, all the skeins are in a pan with some water so that it’s damp before going into the size. I leave everything in here while I prepare the gelatin solution.
Step 3 – Make the gelatin size
I make a very light size. Gelatin size is runny to begin with, so keep that in mind while you’re going through the process. Oh, and here’s what you’ll need:
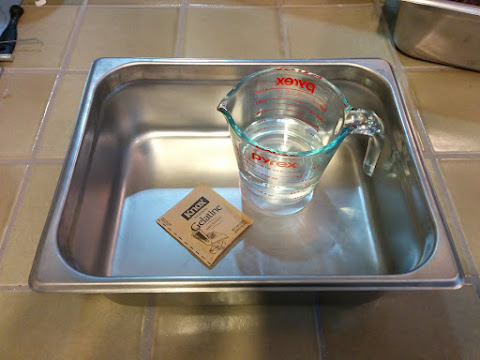
Yup, that’s it. A pan for dipping skeins, gelatin, water and a measuring cup. First, put a cup of cold water in your pan and dump in two (2) packets of gelatin.
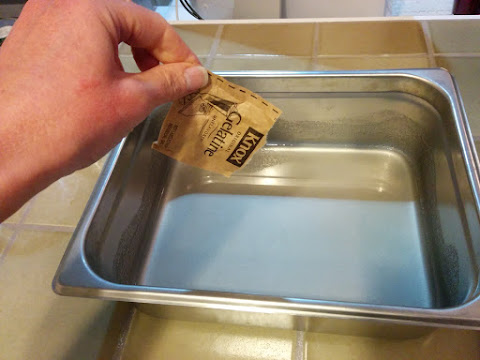
Swirl everything around (you can see the gelatin on the sides of the pan) and let this sit for a few minutes while you boil the water for the next addition. The goal here is to allow the gelatin to bloom – it’ll dissolve more easily if it has a chance to start absorbing water on it’s own.
Now, add another two (2) cups of boiling water to the pan and swirl/stir to dissolve. Once that’s done, add another one (1) cup of cool/room temperature tap water and swirl again to combine. The gelatin solution should be close to room temperature, or slightly warm, but not hot. The concern about heat is around inadvertently felting your yarn or, worse, scalding your hands. Don’t worry about things thickening up – again, this is a light size so you’re good to go.
Step 4 – Size the yarn
Take a skein out of your soaking pan and wring it out so that it’s just damp. Then, put it in the pan with the size and press it to make sure the size thoroughly penetrates the yarn.
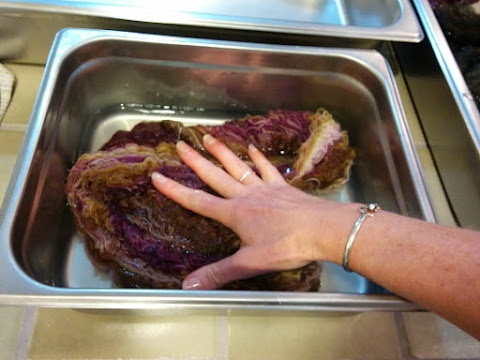
Don’t be shy – if everything’s at room temperature, you won’t felt the yarn. Also, notice that the yarn is probably getting kinked up and twisting back on itself a bit – that’s to be expected. The twist is still there in the yarn waiting to be reactivated and submerging it in water will do that. So, once your skein is thoroughly soaked with the gelatin solution, take it out of the pan and wring out as much of the excess solution as you can. It doesn’t need much and the less excess you leave in the skein, the less will drip off when you hang it up to dry. I have another pan that I use to hold my sized skeins until they’ve all gone for a dip – so keep going until you run out of yarn or you run out of size. I still had quite a bit leftover after all eleven skeins went in so it goes a long way.
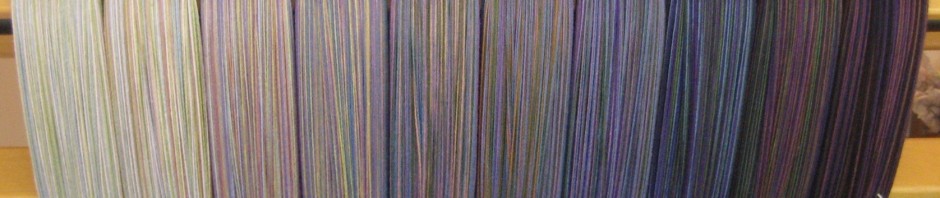
Step 5 – Hang skeins to dry
For this step, you’ll need to either find a way to weight your skeins or stretch them so that you can minimize the kinking up of the singles. I happen to have a drying rack with removable rods that I is just the right size to lightly stretch my ~2 yard skeins. I hook all of them on a top rod and then thread through a few more so that the skeins are spread out and aren’t contracting into tiny little balls.
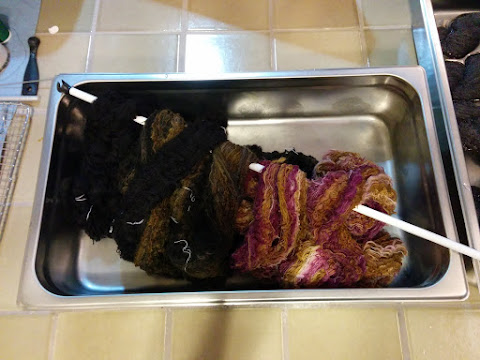
First the rod goes through a group of skeins that’ll hang together:
and then they go onto the drying rack:
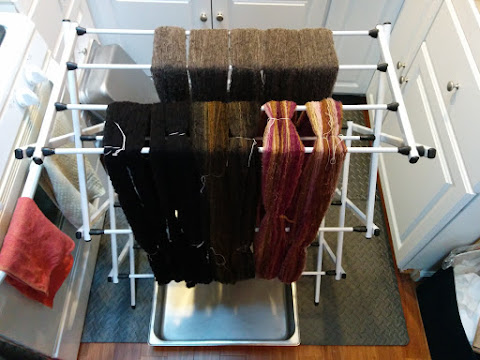
If you look closely at the skeins on the right, you can see that they’re kinked a little bit. I’m not worried about that at all – it’ll work itself out when I wind these off onto bobbins or into balls prior to warping. I just don’t want big sections of ply-back.
Oh, and take note of those pans underneath. They’re catching a TON of drips of gelatin solution that would otherwise be all over my floors. There’s a pan on each side – and those pans will stay there pretty much until the skeins are dry.
Step 6 – Rotate those skeins!
As the skeins are drying, particularly in the first hour or two, the gelatin size will have a tendency to collect/pool at the lowest point – that’s the dripping I mentioned above. The pooling will lead to clumps of size on the yarn if you don’t rotate things. Because of the way I’ve stretched my skeins, it’s easy to just grab a skein and pull so that it rotates over the poles of the rack. I do this every 10 or 15 minutes until the dripping stops. Then, just as I’m passing or when I get up to do something else.
So that’s it. Once the skeins are dry and you’re ready to wind a warp, give the skeins a couple snaps to break loose any sticky parts (there shouldn’t be many) and then wind them onto bobbins or into balls and you’re all set to go. The gelatin may slough off while you’re weaving in the form of a fine powder – give your loom a wipe-down with a damp cloth after you’ve finished weaving the fabric (but you do that anyway, so it’s no bother, right?) to clean up. Finally, be sure to wash the fabric (again, you do this anyway, right?) in warm to hot water with a bit of your favorite detergent to remove the size.
Things to experiment with are the sizing agent you use and the strength of the size. In this case, it’d be more gelatin or less water to increase the concentration. The process is the same, but the yarn will behave differently. I want as little as possible while still achieving the benefits. And, consider sizing your weft yarn as well – it may improve your weaving as well.
And now I get to weave off another length of handspun wool fabric. Since it’s finally cold and rainy out here, it’s the perfect time.
MIND. BLOWN.
Huge appreciation for this post! I have seen sizing discussions but never the whole process detailed. It will help me for future projects, thank you!
You’re welcome, Lara. Should you try this yourself, you may want to go with a stronger gelatin size. I think there’s a correlation between the thickness of the yarn and the strength of the size (heavier yarn, heavier size), but that’s another experiment.