Sampling Part II – Indigo Day

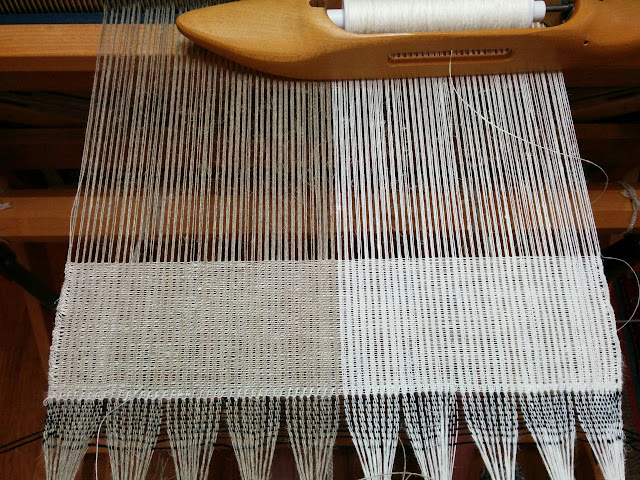
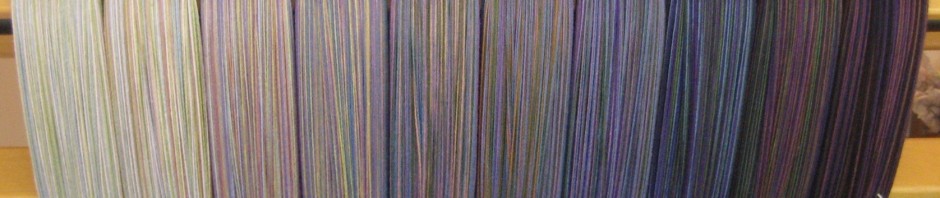
I finished weaving off the hemp samples yesterday and the next step was pulling the shibori ties and then dyeing them in the indigo vat.  I had two small samples – one sett at 32epi and the other at 28epi (but you remember that from the last post!) and one large one.  Here are the two samples ready to be pulled:

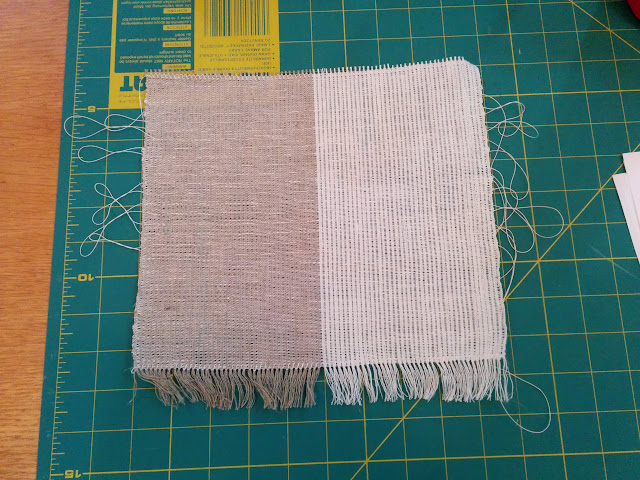
I gathered both of these and the large one.  Once gathered, the big one looked like this:

That lighter stripe at the end of the cloth is woven with a linen/silk thread I purchased a long time ago; remember, this whole thing is a sample and it was a chance to try a different weft.  In fact, I’m quite charmed by the way that little piece of fabric turned out and I’m pretty sure it’ll be making another appearance.  Once tied, all the pieces of fabric went into a big bowl of water to soak.

Next step was sharpening the vat.  I’d made the initial vat months ago and it’s been sitting, covered, in the workshop since then.  Reviving a vat is pretty straightforward – if I had a pH meter, it’d be even easier – it usually requires adding additional soda ash (to increase the pH) and some thiol to reduce the vat/drive out the oxygen.  I put the pot on a cooker and raised the temperature to ~90F, added the soda ash (after dissolving it in water) and then did the same with the thiol.  I let it react for about 30 minutes and then the liquid in the vat was that gorgeous green color and there was plenty of “mother” on top.  Time to dip!

First in were the two samples.  After a 20 minute soak in the vat, they looked like this:

ah, that blue.  There’s nothing like it.  In went the large piece, for the same amount of time, and then I let everything dry.  In today’s heat, that didn’t take long.  If I’d wanted to, I could have dipped a second, third, even fourth time – but I was really happy with how that blue looked, so no additional dipping this time around.

Next step was opening the gathers and washing the fabric.  I use a seam-ripper to cut the gathers near the center of the cloth and then pull the ties free.  Then everything went into the sink and I gave it a good wash using hot water and dish soap.  After a scrub, the fabric was rinsed until the water ran clear and again hung up until almost dry.  Then, a quick press with a hot iron, and lookee here:

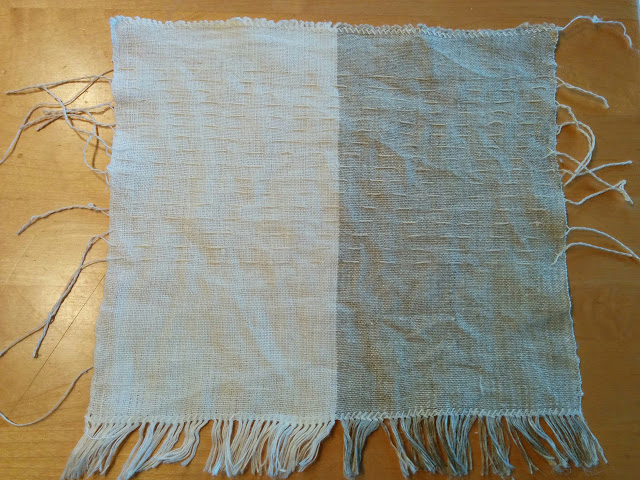
and here’s the big piece:

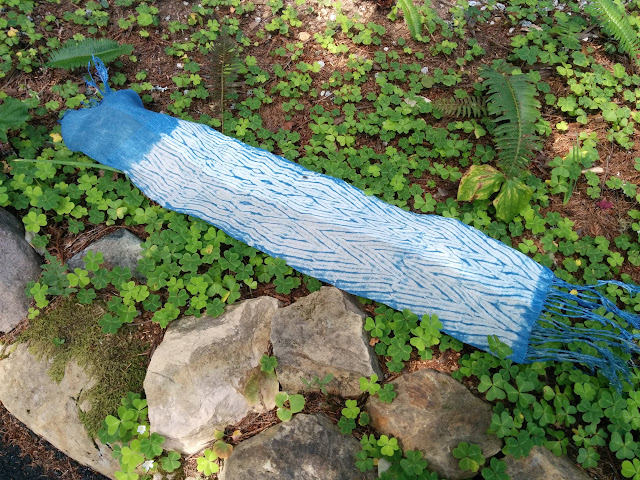
you can see where I started treadling more randomly – at about the half-way point where the big diamonds show up and then it gets much more organic.  Having a look at the treadling, as well as the spacing of the gathers were both on the list of things to try so this will be useful when I start the next round of fabric.  I think I’d like to see more blue and less white the next time so I need to have a look at the the threading and tie-up to see what I can do to expose more of the cloth to the dye.

So, all in all, a good round of sampling and practicing my indigo vat management skills.  A good way to spend a day.  I had a look at the vat and there’s a hint of green left in the water:

but I’m done for today.  I know I can wake it up another day.

Posted in Dyeing, Weaving | Tagged , , , | Comments Off on Sampling Part II – Indigo Day

Sampling – and why you should

Quite some time ago (I’m embarrassed to admit how long ago, actually) I started putting a warp on the loom to try out some hemp singles I’d bought.  Hemp, which behaves similarly to linen, is a different beast from what I normally use and so I knew It’d be a good idea to do some experimenting before starting a project.  In this case, I want to use hemp fabric for woven shibori so I set up the loom and got started weaving.

First step, as always, is tying on and weaving a short header to check threading and spread the warp.  I fixed a few threading errors (rather cavalierly, I might add, but as long as I could get plain weave and something resembling my shibori pattern, it didn’t matter) and then got to weaving.  After a couple inches, I had this:

Yes, the selvedges are pretty wonky, but there’s a bigger problem looming – reed marks.  For the sett I wanted, I had to put four ends in each dent of the reed.  Not a problem at all for what I’ve done in the past, but rather concerning for hemp.  You see, it’s got no elasticity at all and I didn’t know if those reed marks would go away in the finishing.  Further, I just couldn’t beat the fabric to square.  I was two picks short per inch – not necessarily a huge problem but I really wanted a balanced fabric.  Ok, that’s two things that need addressing in the next sample.

Last thing to test was the shibori.  I’ve got a new gathering thread I’m trying out (a 4/20 cotton given to me by a friend) and I need to know not only if it’ll stand up to the gathering/knotting process but also what it does to the final fabric.  I expect holes where the thread was after I pull it out, but until I do it, I won’t know how big the holes will be.  So, I wove off three repeats of the shibori pattern, then another couple inches, hemstitches and cut the fabric off.  And that gave me this:

There are the reed marks, in all their glory.  Also interesting – essentially ZERO draw-in.  10″ in the reed, 10″ off the loom.  And, I gotta tell ya, that fabric was STIFF.  Next step, into a big bowl of hot, soapy water for a soak.  I also really worked the fabric while it was in the bowl to try and get the threads to move and resettle as much as possible.  Scrubbing, rubbing, squeezing and overall seriously abusing the fabric.  That done, I gave it a rinse, a hard press, another round of abuse/pressing and out came this:

Yes, it’s still a bit wrinkly (I rushed that last pressing) but the stunner is that the reed marks are gone.  GONE.  Ok, a teeny bit visible at the hemstitched edges, but nowhere to be found in the body of the fabric.  Here’s the proof:

The heavy horizontal lines are the shibori threads – but clearly, the reed marks are gone.  Plus, the hand of the fabric is pretty amazing.  Exactly what I would expect from a fine linen fabric.  But – I think it might be a bit denser than it needs to be, so I’m going to weave off another two samples at looser setts .  Same drill in the weaving, both standard fabric as well as a shibori section so that I can gauge the post-finishing holes.  And, I’ll be able to dye all of them to see how the fabric reacts to different processes.  At least one is hitting the indigo vat (once I wake it up) and I’ll also try some fiber-reactive dye.

So, for the cost of about a day’s work (and I probably have another half-day to weave off the other samples), I’ve learned a bunch about how this yarn behaves on the loom (yep, tension is going to be a problem and I need to keep an eye on that), how it behaves in the finishing (don’t sweat the reed marks), and I’ll have a few different versions of the same cloth for comparison.  Cost wise, I’m probably spending about $2 in yarn, and I bought enough that I’ll still have plenty left over for my project.

Sample with purpose, my friends.  Know what you want to learn, and then go learn it.  You’ll be happier in the long run.

Posted in Weaving | Tagged , , | Comments Off on Sampling – and why you should